

Half Buckle Baby Carrier: How to put it on quickly.
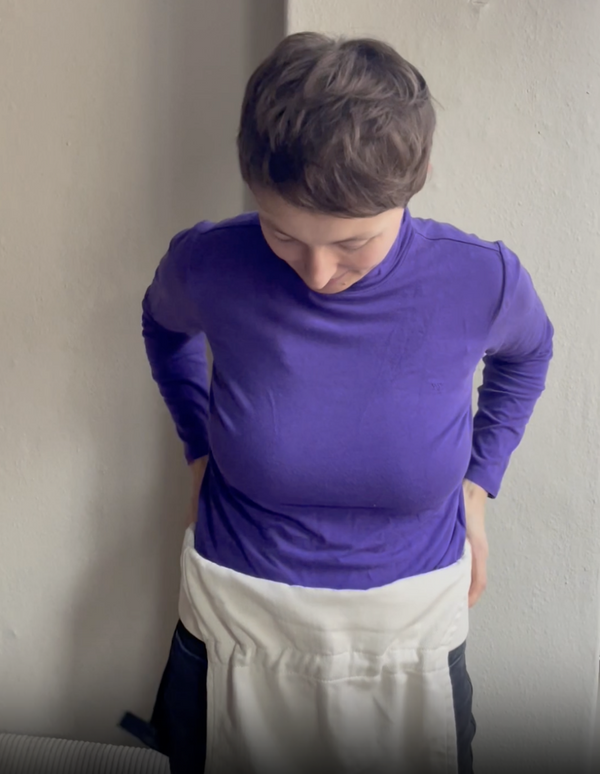
Step 1: Close the hip belt
Place the hip belt firmly around your waist or hips (depending on the carrying height). Fasten the buckle securely.
Please note: The hip belt should fit tightly, as it will carry most of the weight later.
Step 1: Close the hip belt
Place the hip belt firmly around your waist or hips (depending on the carrying height). Fasten the buckle securely.
Please note: The hip belt should fit tightly, as it will carry most of the weight later.
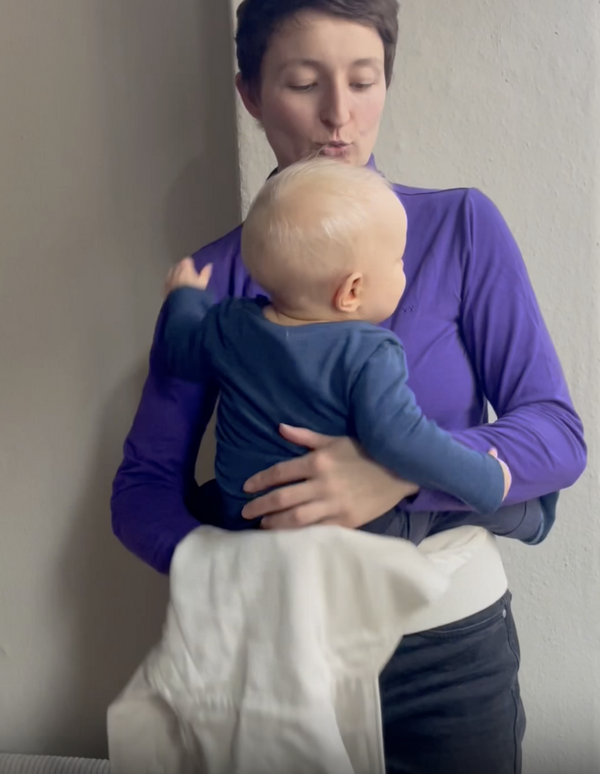
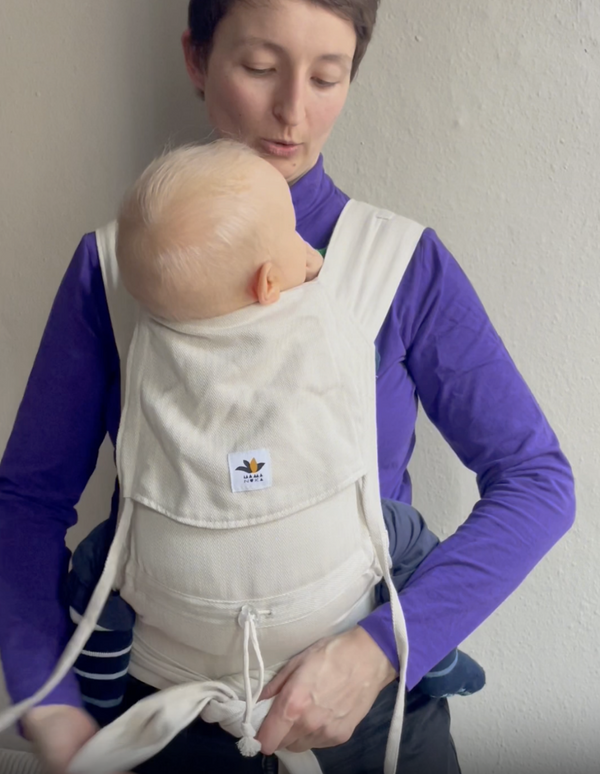
Step 2: Position the baby
Hold your baby centered on your chest, directly above the fastened hip belt. Hold your baby firmly with one hand and pull the carrier fabric between your baby's legs.
Make sure: The baby should be in the spread-squat position (ASH) , with the knees slightly drawn up.
Step 2: Position the baby
Hold your baby centered on your chest, directly above the fastened hip belt. Hold your baby firmly with one hand and pull the carrier fabric between your baby's legs.
Make sure: The baby should be in the spread-squat position (ASH) , with the knees slightly drawn up.
Step 3: Pull up the back panel
Pull the back panel of the carrier up over your baby's back and place the first shoulder strap over your shoulder.
Make sure the fabric supports your baby's entire back. The baby should "fall" into the fabric with a slight curve.

Step 3: Pull up the back panel
Pull the back panel of the carrier up over your baby's back and place the first shoulder strap over your shoulder.
Make sure the fabric supports your baby's entire back. The baby should "fall" into the fabric with a slight curve.
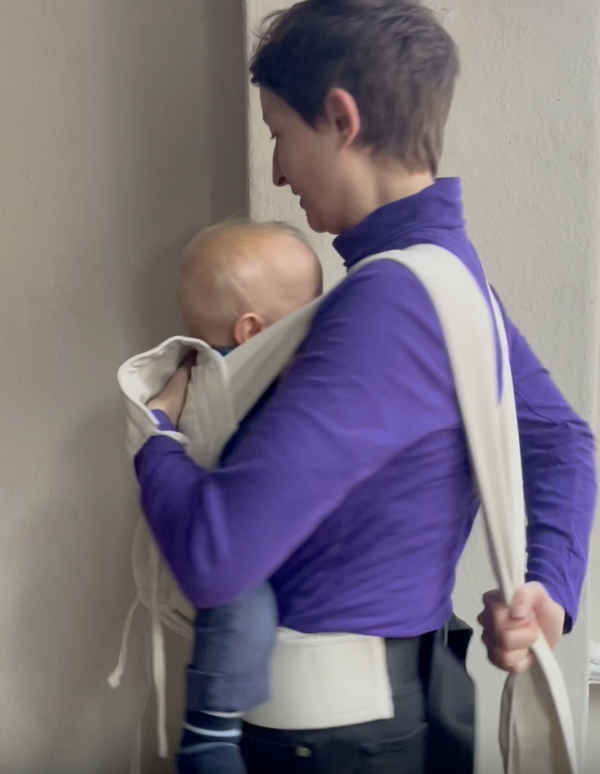
Step 4: Shoulder straps over the shoulders
Bring the long straps back over one shoulder at a time. Keep the straps smooth and taut to avoid wrinkles. Make sure the straps lie flat on your shoulders, ready to cross over your back.
Step 4: Shoulder straps over the shoulders
Bring the long straps back over one shoulder at a time. Keep the straps smooth and taut to avoid wrinkles. Make sure the straps lie flat on your shoulders, ready to cross over your back.
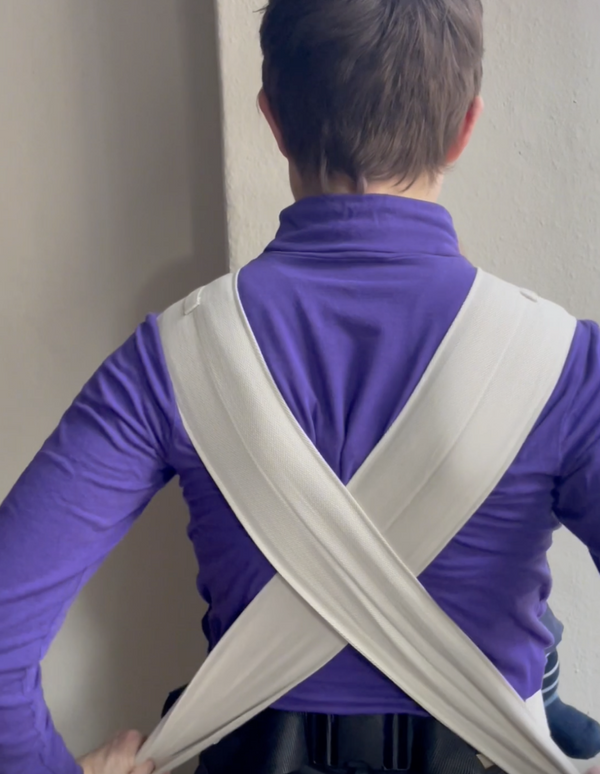
Step 5: Cross on your back
Cross the straps on your back and apply sufficient tension to the straps.
Please note: The crossing should be relatively high in the shoulder blade area to optimally distribute the weight and relieve the strain on your shoulders.
Step 5: Cross on your back
Cross the straps on your back and apply sufficient tension to the straps.
Please note: The crossing should be relatively high in the shoulder blade area to optimally distribute the weight and relieve the strain on your shoulders.
Step 6: Tighten and guide forward under baby's legs
Bring the straps forward under your baby's legs (from the back of the knee to the back of the knee), pulling the fabric evenly taut once more.
Please note: By tightening, you ensure that the spread-squat position (ASH) and back support are maintained.
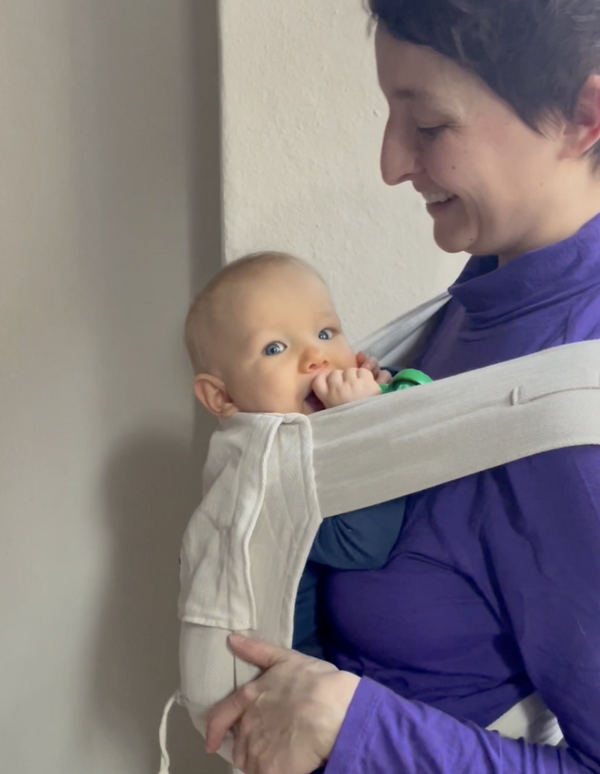
Step 7: Knots and final inspection
Tie the straps securely under your baby’s bottom (double knot).
Final check: Give your baby a kiss on the head (head kiss height) and check if the face is clear.
Make sure your baby is in the correct position. A tight, secure knot completes the process.
Step 7: Knots and final inspection
Tie the straps securely under your baby’s bottom (double knot).
Final check: Give your baby a kiss on the head (head kiss height) and check if the face is clear.
Make sure your baby is in the correct position. A tight, secure knot completes the process.
Mama Nuka Half Buckle: Video Guide
Our Half Buckle Carrier offers superior comfort and grows seamlessly with your child. It is the quick and flexible solution for everyday life. This short video demonstrates how to put on your Half Buckle by yourself and how to ensure the correct M-position.


